Balcony Solar Planning Checklist (for 600–800W Kits)
Plug and Play Balcony Solar systems are designed for easy installation, but there are some things to consider when you are evaluating your options. These systems can typically be installed by someone with basic skills with hand tools. Some installations can be more challenging if the it requires a more complicated mounting system.
a handy homeowner
✅ 1. Measure Your Balcony Space
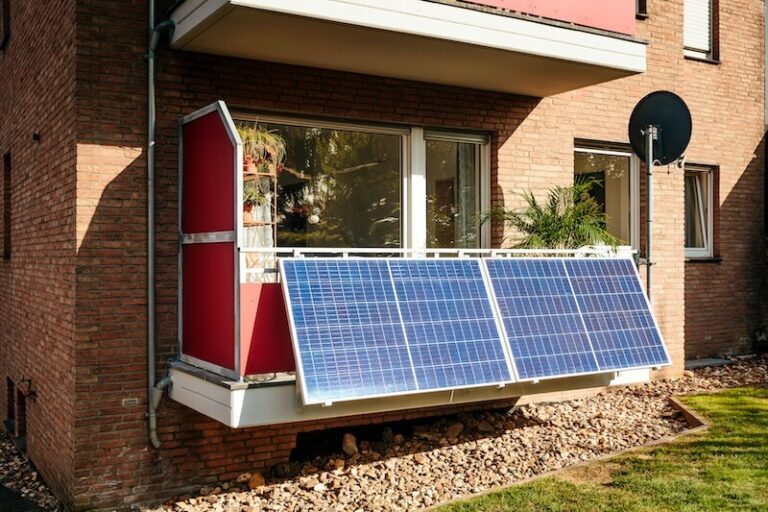
- Horizontal railing length measured (minimum ~7 ft / 214 cm for two 400W panels).
- Vertical drop measured from top rail to floor (panels often hang 65–70 in / 165–178 cm).
- Check railing segments for posts, corners, or obstructions.
- Confirm depth clearance (panels + brackets need ~3–5 in).
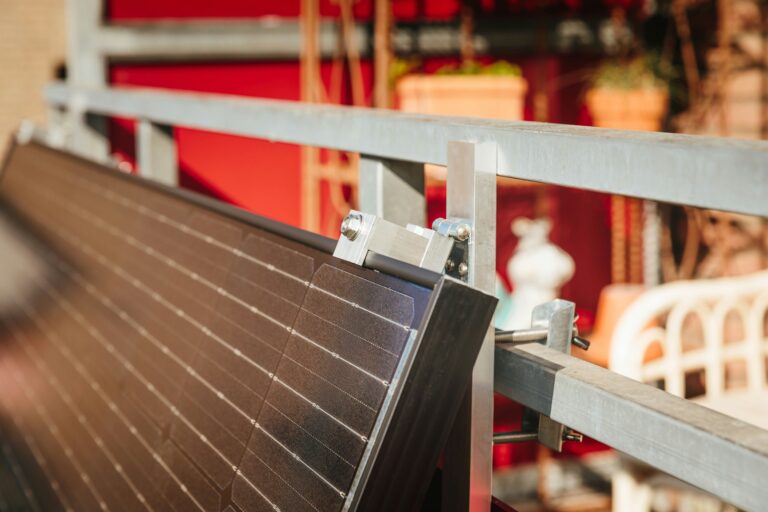
✅ 2. Analyze Railing Suitability
- Railing material can support mounting clamps or straps (steel, aluminum, or wood preferred).
- Railing is not glass-only or restricted by building rules.
- No protrusion restrictions from HOA or landlord.
- Sufficient airflow behind panels for cooling.
✅ 3. Evaluate Sun Exposure
- Balcony faces south, southeast, or southwest for best yield.
- Not shaded by roof overhangs, trees, nearby buildings, or privacy walls.
- Sun path checked at morning, noon, and afternoon.
- Space allows moderate tilt angle (20–40°) if brackets support it.
✅ 4. Confirm Electrical Requirements
- Nearby outdoor or indoor outlet available.
- Outlet supports standard plug‑in microinverter connection.
- Extension cord not creating tripping hazards (if needed).
- Know your region’s AC output limits (EU 600–800W, US varies).
✅ 5. Choose Panel Configuration
- Decide between:
- 2 × 400W panels (common 800W balcony setup).
- 4 × ~200W panels (more modular, easier to fit).
- Check panel dimensions match measured railing space.
- Mounting brackets and clamps selected for your railing type.
✅ 6. Safety & Structural Checks
- Panels will not interfere with doors, screens, or window openings.
- System will not block fire egress routes.
- Wind load accounted for (add storm straps or safety cables).
- Brackets rated for outdoor UV and corrosion resistance.
✅ 7. Plan Cable Routing
- AC cable length adequate to reach inverter and outlet.
- Microinverter positioned behind panels with good airflow.
- Cables secured with UV‑resistant zip ties.
- No cables hanging loosely or rubbing sharp edges.
✅ 8. Check Regulatory Requirements
- Local rules allow plug‑in solar.
- Microinverter is grid‑certified in your region.
- Any required notifications to utility completed (if applicable).
- System includes labeling or disclaimers as required.
✅ 9. Consider a Patio Installation (if railing won’t work)
- Patio area has 7–10 ft × 6–8 ft free space for A‑frame stands.
- Area receives strong sun without shading.
- Stands can be weighted (sandbags, concrete blocks).
- No interference with walking paths or furniture.
✅ 10. Final Pre‑Installation Checks
- All fasteners, brackets, and tools ready.
- Panels inspected for damage before mounting.
- Power circuit not overloaded (optional: use energy monitor).
- Camera or photos taken to document installation for landlord/HOA.